VNCI 6154A B-C-End RemoteDiag Usage Instructions
Business (B-End)
Prerequisites:
1. A laptop with ODIS software installed and internet access.
2. VNCI 6154A remote diagnostic software must be installed.
Customer (C-End)
Prerequisites:
1. A computer that can connect to the internet.
2. Must have a VNCI 6154A device.
3. Must have VNCI 6154A Device Manager version 3.2 or higher installed.
4. VNCI 6154A firmware version 1.1.6.6 or higher.
B-End Usage Instructions
Step 1: Register the Software (Only needs to be done once)
After installing the VNCI 6154A remote diagnostic software, the software needs to be registered. There are two methods for registration.
Method 1:
If you have a VNCI 6154A device, connect the VNCI 6154A to your computer, then run the VNCI 6154A remote diagnostic software. The software will automatically register.
Method 2:
If you do not have a VNCI 6154A device, the remote client must have a VNCI 6154A device. The client connects the VNCI 6154A device to their computer and runs the VNCI 6154A Device Manager, then navigates to the "Remote Diagnostics" menu and clicks the "Copy Registration Code" button. Paste this registration code into the registration code input box in the VNCI 6154A remote diagnostic software. As shown below:
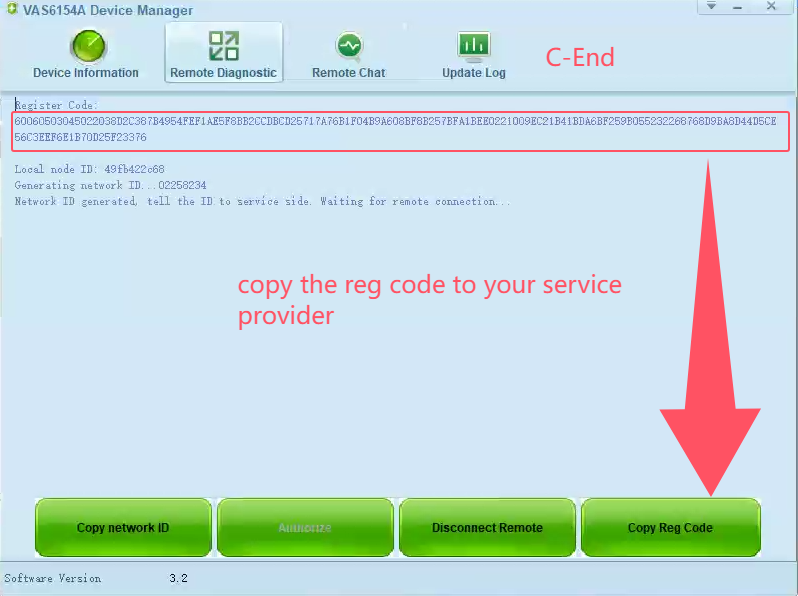
VNCI 6154A Device Manager (Remote Diagnostics C-End)
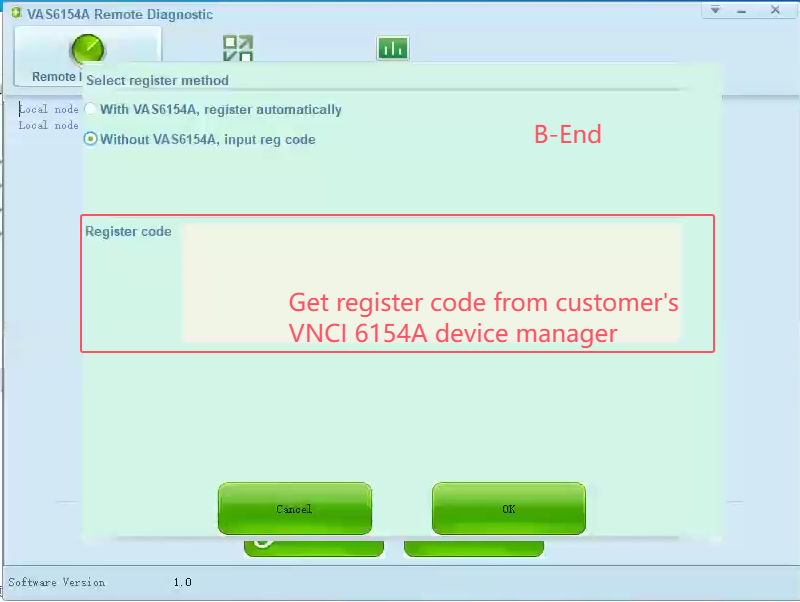
VNCI 6154A Remote Diagnostics B-End
Step 2: Establish a Remote Diagnostics B-End and C-End Connection
Run "VNCI 6154A Remote Diagnostics" ---> Click the "Join Network" button, then enter the client's network ID (obtained from the client) in the prompt box, and click the "Confirm" button.
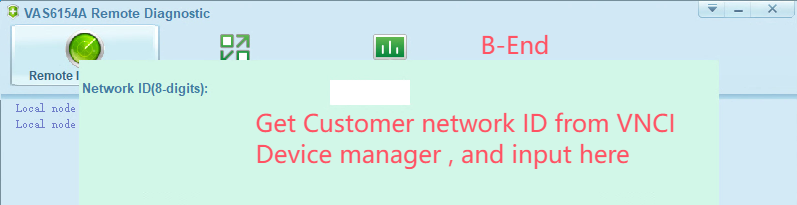
Remote Diagnostics B-End enter Network ID

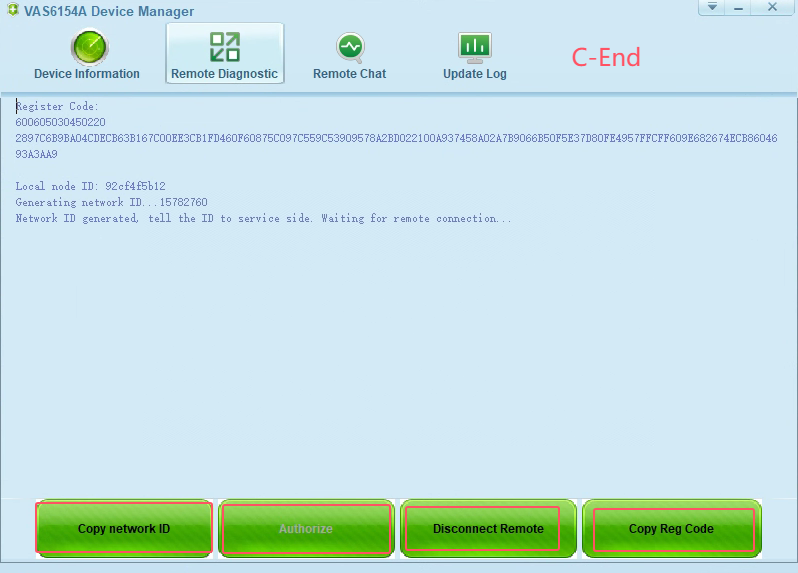
Remote Diagnostics C-End - Obtain Network ID
After entering the client's network ID, inform the client to accept the connection request (the client clicks the "Authorize Server" button).
Step 3: Start Remote Diagnostics
Once the client authorizes the server, remote services can begin. To disconnect the remote diagnostics, run the VNCI 6154A Device Manager or VNCI 6154A Remote Diagnostics server software and click "Disconnect Remote" or "Disconnect Network."
Note: During the remote diagnostics process, both the client's VNCI 6154A Device Manager (C-End) and the VNCI 6154A Remote Diagnostics server software (B-End) must be running simultaneously.
C-End Usage Instructions
Step 1: Prepare the Relevant Equipment
Prepare a computer with internet access and a VNCI 6154A device. Install VNCI 6154A Device Manager version 3.2 or higher on the computer, then connect the VNCI 6154A device to the car's OBD-II port and connect the VNCI 6154A to your computer via USB cable.
Step 2: Provide Relevant Parameters to the VNCI 6154A Remote Diagnostics Server (B-End)
Run the VNCI 6154A Device Manager (C-End) on your computer, select the "Remote Diagnostics" menu button. Provide the necessary parameters as requested by the server and perform the required operations as instructed by the server.
Previous post:VNCI PT3G wireless connection configuration details
Next chapter:没有了!
